A good image prompt turns a visual idea into clear instructions. It tells the AI what to create or change, which details matter, and what should remain untouched.
This guide explains how image prompts work, how to write one, how to use prompts in XPT, and gives you 50 examples for common generation and editing tasks.
What Is an AI Image Prompt?
An AI image prompt is a written instruction that describes the image you want to generate or the change you want to make to an existing image.
A generation prompt builds an image from an idea:
A quiet mountain cabin beside a frozen lake at sunrise, warm light glowing through the windows, wide cinematic composition, realistic landscape photography.
An editing prompt begins with an existing image and defines a controlled change:
Replace the cloudy sky with a clear sunset sky. Keep the buildings, trees, people, camera angle, and foreground unchanged. Match the original light direction and reflections.
The difference is simple: generation prompts describe what should appear; editing prompts must also say what should stay the same.
What Should a Good Image Prompt Include?
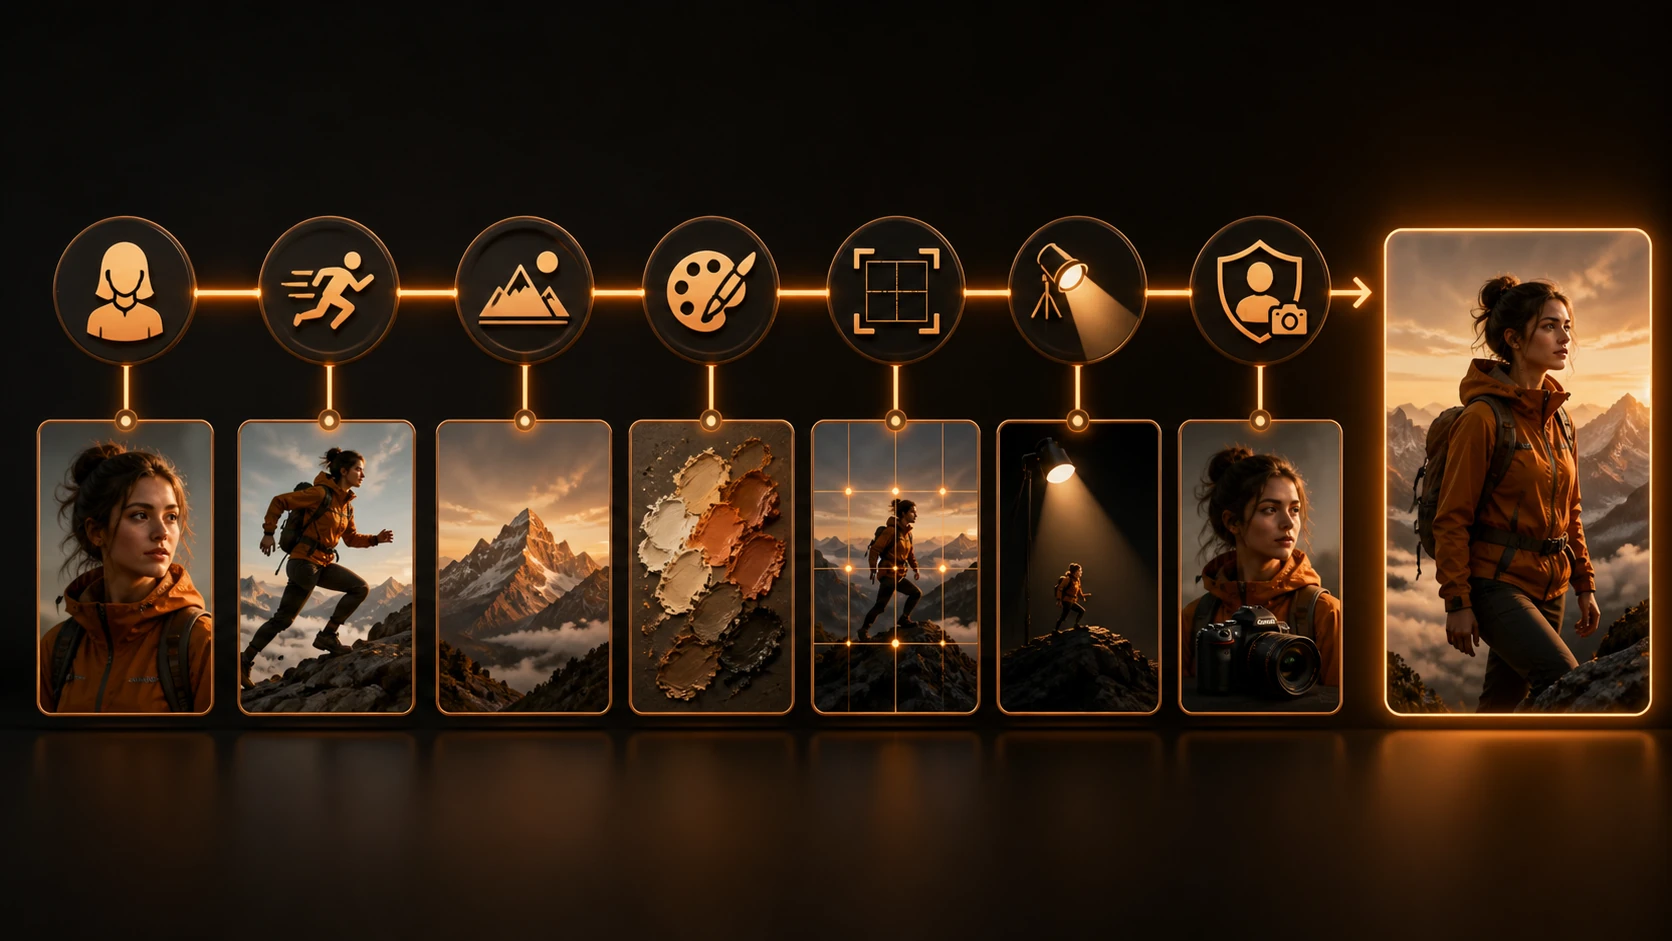
You do not need every element in every prompt. Include the details that affect the result:
| Element | What to describe | Example |
|---|---|---|
| Goal | Generate, replace, remove, restore, or restyle | Replace the background |
| Subject | The main person, object, product, or scene | A ceramic perfume bottle |
| Action or change | What is happening or being modified | Floating above black stone |
| Setting | Where the subject appears | A minimal studio |
| Style | Photography, illustration, anime, 3D, collage | Editorial product photography |
| Composition | Framing, angle, position, and aspect ratio | Close-up, centered, 16:9 |
| Lighting and color | Light direction, softness, palette, mood | Warm side light, deep brown shadows |
| Important details | Material, texture, clothing, expression, text | Frosted glass and a gold cap |
| Preserve list | Details that must not change in an edit | Keep the face and pose unchanged |
| Exclusions | Unwanted additions or alterations | No logo, text, or extra objects |
For generation, use this formula:
Subject + action + setting + style + composition + lighting + important details
For editing, use this version:
Action + target + desired result + visual integration + preserve list + exclusions
How to Make a Prompt More Effective
Start with the Result, Not a List of Keywords
Write the first sentence as a clear creative decision. “Create a product photo of a frosted perfume bottle on black stone” gives the model a stronger foundation than a loose string such as “luxury, cinematic, beautiful, 8K.” Add supporting details only after the subject and task are clear.
Replace subjective words with visible choices. Instead of “make it premium,” specify dark polished stone, controlled reflections, a warm spotlight from the left, and generous negative space. Instead of “make it dramatic,” describe stronger shadow contrast, a low camera angle, and a stormy background.
Organize Details by Priority
Put the instructions in the order a visual director might use:
- State the goal and main subject.
- Describe the action or edit.
- Define the environment and composition.
- Add lighting, color, material, and mood.
- Finish with details to preserve and unwanted changes to avoid.
If the prompt becomes long, separate it into short labeled blocks such as Subject, Scene, Lighting, Composition, and Keep unchanged. Structure matters more than adding more adjectives.
Describe Space, Light, and Materials Precisely
Use position words such as left, right, behind, foreground, and lower third. When adding or replacing an object, explain its scale, perspective, contact shadow, reflection, and light direction so it belongs in the source scene.
Name physical materials rather than relying on style alone: matte leather, frosted glass, brushed aluminum, rough concrete, translucent fabric. For color, use a short palette and identify where each color belongs instead of asking for many competing tones.
Give Every Reference Image One Job
Identify references by order and role:
Image 1 defines identity. Image 2 defines clothing. Image 3 is used only for lighting.
Also say what not to copy. A clothing reference may contain another person and background; tell the model to use only the garment. Too many references with overlapping roles can reduce consistency rather than improve it.
Lock the Parts That Cannot Change
For portraits, list identity cues such as facial structure, age, skin tone, hairstyle, expression, pose, hands, and body proportions. For products, protect shape, dimensions, logo, label text, packaging, and brand colors. For interiors, protect walls, windows, perspective lines, camera position, and furniture placement.
“Keep everything else the same” is helpful, but a short, explicit lock list is safer when accuracy matters.
Edit in Checkpoints
Make one major change, inspect the result, and save a good version before moving on. If the face changes while replacing a background, return to the last approved image and correct only the face. Do not continue building on a flawed version.
Reuse the successful combination of source image, reference set, prompt, and approved output as a production recipe. Image generation is variable, so the same prompt may still require more than one attempt.
How to Use AI Image Prompts
1. Open the Image Tool
Go to XPT. Start from a text idea, or upload an existing image when you want to edit or use a visual reference.
2. Choose Your Input
For a new image, begin with a text prompt. For an edit, upload the clearest original available. If you use reference images, give each one a single job, such as subject, clothing, lighting, style, or composition.
3. Write One Clear Instruction
Lead with the main goal, then add the details that control the result. For edits, finish with a preserve list and exclusions.
4. Generate and Check the Result
Review the whole image, not only the edited area. Check faces, hands, labels, logos, fine patterns, shadows, reflections, and straight lines at full size.
5. Refine One Detail at a Time
If the result is close, make a narrow correction instead of rewriting the entire prompt:
Keep the new background. Restore the original face, skin tone, hairstyle, and pose. Make no other changes.
Work from the last approved version rather than continuing from an image that already contains visible errors.
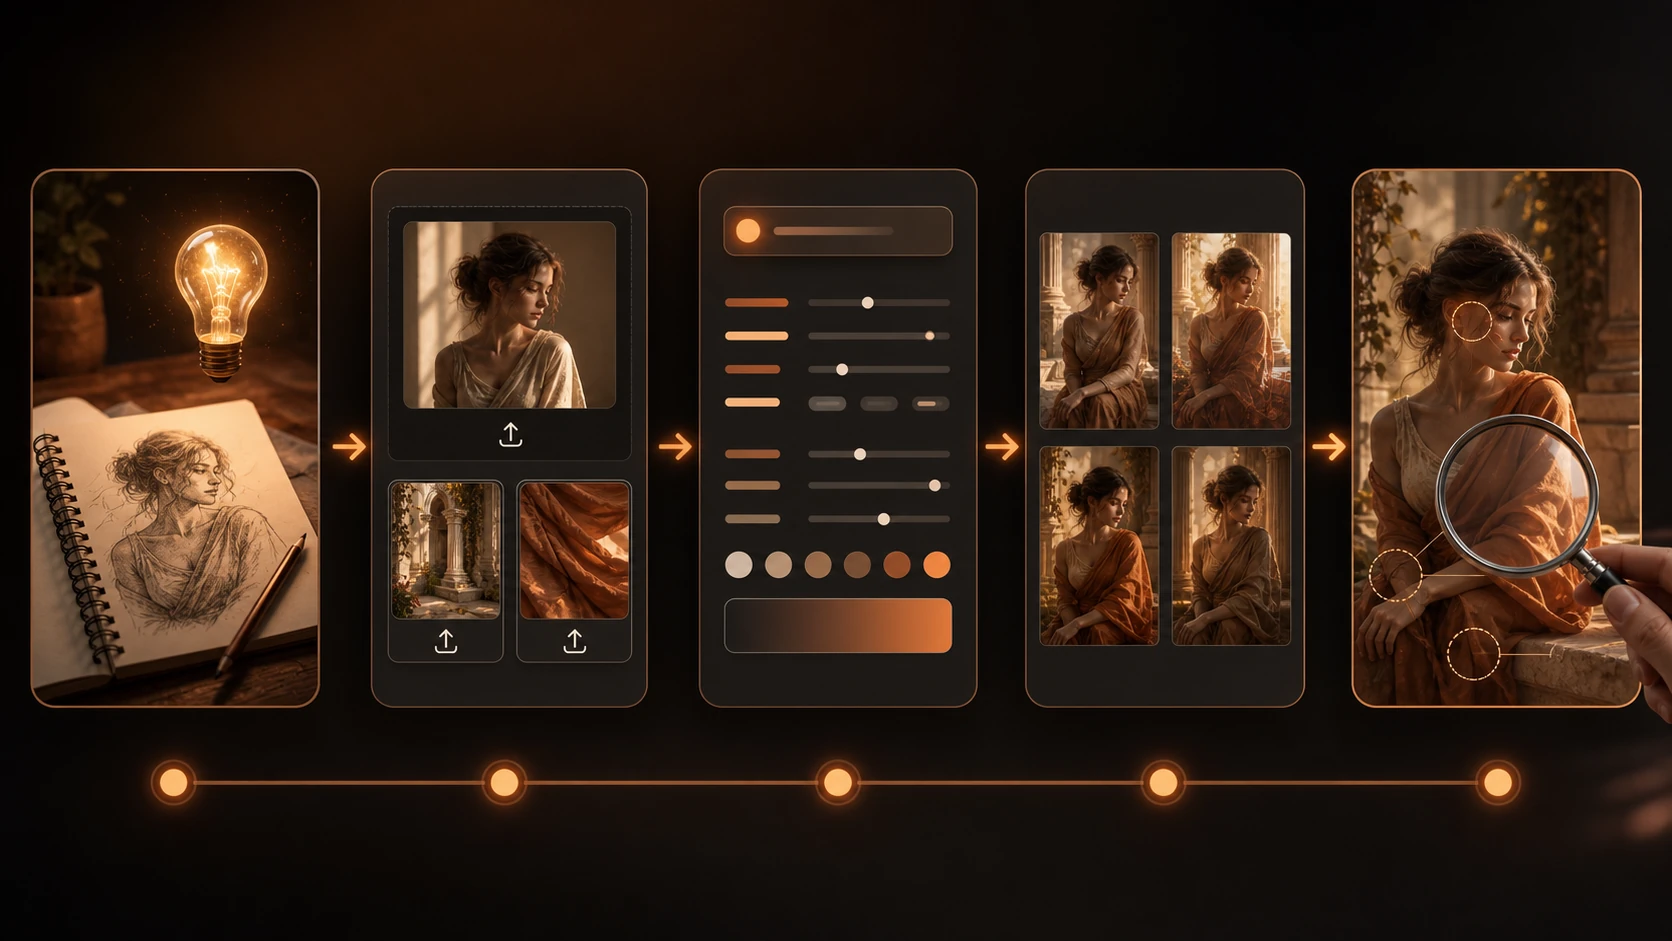
50 AI Image Prompt Examples
Copy these prompts as starting points and replace the details to fit your project.
Image Generation Prompts
1. Editorial Portrait
A confident adult woman in a tailored charcoal suit beside a large studio window, natural expression, editorial fashion photography, medium close-up, soft morning light from the left, realistic skin texture, muted neutral palette.
2. Professional Headshot
A polished professional headshot of an adult man wearing a navy blazer and white shirt, light-gray studio background, centered composition, soft Rembrandt lighting, natural skin texture, sharp eyes, subtle shadows.
3. Product Advertisement
A frosted glass perfume bottle with a brushed-gold cap on dark textured stone, luxury product photography, three-quarter camera angle, warm side light, controlled reflections, deep brown background, clean negative space.
4. Interior Design
A calm Japandi living room with oak flooring, cream linen sofa, low wooden furniture, textured rug, indoor plants, wide composition, soft afternoon sunlight, warm neutral palette, realistic interior photography.
5. Food Photography
Fresh handmade pasta in a rustic ceramic bowl with tomato sauce, basil, and parmesan, warm Italian kitchen background, golden window light, shallow depth of field, inviting editorial food photography.
6. Landscape
A vast mountain valley at sunrise with snow-covered peaks above morning mist, wildflowers in the foreground, golden light touching the summits, wide-angle composition, realistic landscape photography.
7. Anime Character
A full-body anime warrior with short silver hair, layered black armor, and a red scarf on a windswept cliff, determined expression, dynamic pose, dramatic sunset, detailed cel shading, cinematic composition.
8. Fantasy Environment
An ancient library carved inside a giant tree, spiral wooden stairs, glowing books, hanging lanterns, soft fog, warm light against deep green shadows, detailed fantasy environment concept art.
9. Architectural Concept
A brutalist concrete house with large geometric windows surrounded by wild grasses, cloudy sky, strong architectural shadows, minimalist landscaping, eye-level view, realistic architectural visualization.
10. Social Media Graphic
A clean square social media graphic featuring a floating orange sneaker above a dark platform, bold geometric shapes, warm rim light, high contrast, room at the top for a short headline, no generated text.
Reference Image Generation Prompts
11. Preserve a Character
Image 1 is the character reference. Create a new full-body scene of the same character walking through a rainy futuristic city. Preserve the face, hairstyle, body proportions, outfit design, and color palette. Add wet pavement reflections and soft orange streetlight.
12. Use an Outfit Reference
Image 1 defines the person. Image 2 is the outfit reference. Create a studio portrait of the person from Image 1 wearing the coat from Image 2. Preserve the person's identity and the coat's cut, material, buttons, and color.
13. Use a Style Reference
Use Image 1 only as a style reference for its flat shapes, paper texture, navy-and-rust palette, and soft edges. Create a new illustration of a quiet bookstore café. Do not copy people, objects, or text from Image 1.
14. Use a Composition Reference
Use Image 1 as a composition reference. Create a new image with one person on the lower-right third and a large open sky above. Match the camera distance and negative space, but use a coastal setting at sunrise.
15. Use a Lighting Reference
Image 1 is the subject. Image 2 is the lighting reference. Apply only the soft golden side light and gentle shadow contrast from Image 2. Preserve the subject, clothing, pose, background layout, and camera angle from Image 1.
16. Combine Product References
Image 1 shows the product. Image 2 defines the stone surface. Image 3 defines the warm spotlight. Create a product hero image using those roles. Preserve the exact product shape, label, logo, colors, and proportions.
17. Create a Consistent Series
Use Image 1 as the character and style anchor. Create a second scene with the same character reading beside a train window at night. Preserve identity, clothing, line work, palette, and rendering style across both images.
18. Reference a Color Palette
Use Image 1 only for its muted olive, warm cream, terracotta, and charcoal color palette. Create a modern home office with simple furniture and afternoon light. Do not copy the room layout or objects from the reference.
Background Editing Prompts
19. Studio Background
Replace the current background with a warm-gray photography studio. Keep the person, hair edges, face, pose, clothing, crop, and camera perspective unchanged. Match the original light direction and add a natural grounding shadow.
20. Office Background
Replace the background with a modern office featuring pale wood, frosted glass, and soft daylight. Keep the subject unchanged and match the depth of field, perspective, light direction, and color temperature.
21. Outdoor Background
Place the subject in a quiet city park during early autumn. Add soft golden leaves and distant trees with natural depth. Preserve the subject's identity, pose, clothing, scale, edges, and original camera angle.
22. Replace the Sky
Replace the flat gray sky with a clear late-afternoon sky and soft golden clouds. Match the horizon, light direction, and reflections. Keep all buildings, trees, people, and foreground details unchanged.
23. Remove the Background
Remove the background and isolate the product on a clean transparent background. Preserve the exact product edges, shape, label, logo, colors, and natural internal shadows. Do not crop the product.
24. Extend a Background
Extend the image into a wide 16:9 composition. Keep the subject on the right third and continue the existing room naturally into the left side. Preserve perspective, wall lines, lighting, texture, and subject scale. Do not add text.
25. Fantasy Background
Replace the background with a moonlit fantasy forest containing ancient trees, soft mist, and subtle glowing plants. Preserve the character, face, outfit, pose, edges, and camera angle. Match moonlight to the subject.
26. Clean E-commerce Background
Replace the cluttered background with a seamless off-white studio sweep. Preserve the exact product shape, packaging, logo, label text, and colors. Add a soft realistic shadow directly beneath the product.
Object and Clothing Editing Prompts
27. Remove an Object
Remove the plastic bottle on the table to the left of the laptop. Reconstruct the wood grain, reflection, and shadow from the surrounding area. Keep every other object unchanged.
28. Add an Object
Add a ceramic coffee cup beside the notebook. Match the desk perspective, morning window light, shadow softness, focus, and grain. Do not cover or move any existing object.
29. Replace a Lamp
Replace the black desk lamp with the orange sculptural lamp from Image 2. Match the scale, perspective, contact shadow, reflected light, and focus. Keep the desk, books, wall, and camera angle unchanged.
30. Change a Jacket
Replace the denim jacket with a tailored dark-green wool coat with black buttons. Make the fabric follow the original pose and folds. Preserve the same person, face, hair, hands, proportions, background, and lighting.
31. Change a Full Outfit
Replace the casual outfit with a black evening suit and white shirt. Preserve identity, body proportions, pose, hands, facial expression, hairstyle, background, and camera angle. Do not add jewelry or logos.
32. Add an Accessory
Add thin round silver eyeglasses to the person. Match the face angle, eye position, light, reflections, and depth of field. Preserve the eyes, facial features, expression, hair, and skin texture.
33. Change Furniture Material
Change only the chair upholstery from gray fabric to cognac-brown matte leather. Preserve the chair shape, stitching, frame, proportions, position, room, and lighting. Make the leather follow existing folds.
34. Replace Product Packaging
Replace the plain paper box with a matte charcoal box using the label design from Image 2. Preserve the product position, box dimensions, perspective, lighting, shadows, and every other object. Keep all supplied label text exact.
Creative Image Prompts
35. Cinematic Portrait
Transform the portrait into a restrained cinematic still with cool shadows, warm skin tones, soft highlight roll-off, and subtle film grain. Preserve identity, expression, pose, clothing, composition, and natural skin texture.
36. Editorial Illustration
Transform the photo into a clean editorial illustration with flat shapes, subtle paper texture, and a navy, cream, and rust palette. Preserve the people, poses, composition, objects, and visual hierarchy. Do not add text.
37. Retro Film Look
Restyle the photo as a 1970s analog film image with warm faded colors, fine grain, soft contrast, and slight light leaks. Preserve the people, clothing, environment, and composition. Avoid heavy damage effects.
38. Cyberpunk Scene
Transform the street scene into a rainy cyberpunk city at night with orange and teal signs, wet reflections, soft haze, and futuristic storefronts. Preserve the people, street geometry, camera position, and main composition.
39. Fantasy Character Poster
Turn the character portrait into a fantasy poster with dark royal armor, a moonlit castle, drifting mist, and dramatic rim light. Preserve the face, hair, expression, body proportions, and pose. Leave clean space for text to be added later.
40. Surreal Collage
Create a surreal editorial collage from the photo: the subject standing inside a giant open book with clouds flowing from the pages, tactile paper textures, balanced composition, muted orange and cream palette, no generated text.
41. Clay 3D Style
Transform the scene into a polished clay 3D illustration with rounded forms, tactile surfaces, soft studio light, and a warm pastel palette. Preserve the main subject, pose, object placement, and composition.
42. Campaign Banner
Adapt the image into a wide campaign banner. Keep the subject on the right, simplify the background, and create generous negative space on the left. Preserve identity, product details, lighting, and visual focus. Do not generate text.
Restoration and Correction Prompts
43. Restore an Old Photo
Repair scratches, tears, dust spots, and faded contrast. Preserve the original people, facial features, clothing, composition, era, and monochrome character. Reconstruct only damaged areas. Do not modernize faces or invent details.
44. Correct a Color Cast
Remove the strong yellow cast and restore neutral whites, natural skin tones, and balanced contrast. Preserve the original light direction, exposure detail, objects, composition, and atmosphere.
45. Reduce Glasses Glare
Reduce the bright glare on the eyeglass lenses so the eyes are visible. Preserve the frame, lens shape, eye color, facial structure, expression, skin texture, and lighting. Keep a subtle realistic reflection.
46. Improve a Low-Light Photo
Brighten the low-light photo while preserving a natural night atmosphere. Recover face and clothing detail, reduce color noise, keep highlights controlled, and preserve the original light sources and shadows.
47. Remove Motion Blur
Reduce mild motion blur on the subject and restore natural edge detail. Preserve facial features, hair texture, clothing, background, lighting, and camera framing. Avoid oversharpening or artificial outlines.
48. Repair Damaged Product Detail
Repair the small scratch on the front-left corner of the product. Reconstruct the original material, color, texture, and reflection. Keep the shape, logo, label text, perspective, background, and lighting unchanged.
49. Straighten Architectural Lines
Correct the vertical perspective so walls and window frames appear straight. Preserve the building proportions, crop, materials, signage, lighting, and surrounding environment. Do not redesign the architecture.
50. Reframe Without Cropping the Subject
Convert the portrait to a centered square composition. Extend the existing background naturally, leave comfortable space around the head and shoulders, and preserve the face, hair, expression, clothing, lighting, and scale.
Frequently Asked Questions
These questions reflect current search demand and recurring problems in recent community discussions, including reference-image priority, identity drift, ignored local edits, and inconsistent characters.
How long should an AI image prompt be?
There is no ideal word count. A simple generation may need one or two clear sentences; a multi-reference edit may need labeled sections. Keep every detail that changes the visible result, but remove repeated adjectives and conflicting directions. If the model misses instructions, split the task into stages before making the prompt longer.
Why does the AI ignore part of my prompt?
The request may contain too many competing priorities, or the missed detail may be buried near the end. Put the most important instruction first, reduce the task to one main change, and restate the target with its location.
How can I keep the same face when changing clothes or backgrounds?
Use a clear, well-lit identity reference and assign it the highest priority. Lock facial structure, age, skin tone, eyes, hair, and body proportions, then request one change at a time. Separate identity, body, and optional clothing into clearly labeled references. Perfect identity preservation is still not guaranteed, so compare every result with the source.
Why did the model copy the person from my clothing reference?
The model may treat the entire reference as a subject rather than extracting only the garment. Label the source person as the identity anchor and say that the clothing image controls only the garment. Add: “Do not copy the face, body, pose, or background from Image 2.”
Why does changing one object alter the rest of the image?
Generative editors may redraw more pixels than a traditional layer-based editor. Name the exact object and location, use “change only,” list nearby elements to preserve, and work from the original or last approved version. If the tool supports selecting an area, use it to narrow the edit.
Why does the same prompt produce different images?
Image generation includes variation, and models may interpret the same words differently across attempts or product updates. Save successful outputs, references, and prompts together. A prompt alone is not a permanent identity lock, so check consistency after every generation.
How should I handle text, logos, and exact brand colors?
Keep text short, place it in quotation marks, specify its location, and verify every character manually. For logos, labels, and brand colors, use supplied assets or a deterministic design pass when exact reproduction matters. AI layouts, readable text, and exact hex colors can remain unreliable even when the broader visual concept succeeds.
Should I use negative instructions such as “no text” or “no extra objects”?
Use concise exclusions after a positive description of the desired image. “Clean wall with open negative space; no signs or text” is clearer than a long negative-prompt list. Some models handle exclusions differently, so check the output rather than assuming the wording guarantees compliance.
Can XPT help rewrite or polish an image prompt?
Yes. Start with a rough idea and ask XPT to turn it into a structured prompt containing the subject, setting, composition, lighting, style, important details, and constraints. For an edit, also ask it to add a preserve list and assign a role to every uploaded reference image. Review the polished prompt and remove any invented detail before generating.
Turn Your Prompt into an Image
You do not need to begin with a finished prompt. Start with a rough idea, a reference image, or one of the 50 examples above. Replace the subject and visual details, then keep only the instructions your project actually needs.
If the idea is difficult to describe, use XPT to rewrite or polish it first. Ask for a structured image prompt with a clear subject, environment, composition, lighting, style, and constraints. For reference-based editing, ask XPT to identify the role of every image and add an explicit list of details that must remain unchanged.
Generate the first version, inspect it at full size, and continue with focused follow-ups. A clear opening prompt establishes direction; small revisions help preserve what already works.
Try your prompt in XPT's AI Image Generator and develop the result one focused change at a time.